Category: Uncategorized

  • Hospice Care

    Mature Health: Over Age 50

    Hospice care is for people with a terminal illness. To enter a hospice program (and to receive Medicare benefits), a doctor’s diagnosis is required stating that life expectancy is no more than about 6 months. No efforts are made to prolong life or to hasten death. The patient is kept comfortable and pain free. Hospice eases the process of dying. Most referrals for hospice come from doctors. Hospice care may be provided in:

    *  The home. Eighty percent of persons enrolled in hospice are cared for at home.

    *  A hospital

    *  A nursing home

    *  A hospice facility

    The bulk of care, especially with home hospice, is usually given by family members and friends. It is supported by a hospice care team which includes doctors, social workers, therapists, volunteers, clergy, nurses, and family members. The team plans care that ensures quality of life. {Note: VA offers Hospice & Palliative Care.}

    Most health insurance plans include the option of hospice care. Medicare and Medicaid cover the costs if the facility or hospice organization is certified by them. Under Medicare, the length of stay is two 90 day benefit periods. This may be followed by a 30 day period. Extensions are available. Persons must be certified to be terminally ill at the start of each period.

    Sometimes patients are charged if they do not qualify for reimbursement. Hospice care is based on need. No one is rejected for lack of finances.

    Some advantages to hospice care include:

    *  Availability of 24 hour a day, 7 day a week assistance. This is true for hospice care in hospitals, nursing homes, and hospice facilities. Find out if the home hospice program offers this service.

    *  Respite for family caretakers when care is given in the home

    *  Emotional comfort and support by trained hospice staff and volunteers

    *  Bereavement counseling

    Resources
    The National Hospice and Palliative Care Organization

    1-703-837-1500

    www.nhpco.org

    Health at Home Lifetime book by the American Institute for Preventive Medicine. www.HealthyLife.com. All rights reserved.

    © American Institute for Preventive Medicine

  • 5 Numbers You Need To Know By Heart

    SELF-CARE CORNER

    Close-up image of doctor's hand holding a green apple.

    Pass codes, phone numbers, social security numbers, clothing sizes and addresses. We all have a lot of numbers in our heads, but heart experts at The Ohio State University Wexner Medical Center say there are 5 more numbers you need to know. These are the numbers your doctor will use to assess your risk for getting heart disease.

    1.Blood pressure.This is the force of blood against the walls of the arteries. It’s measured as two numbers-the systolic pressure, as the heart beats, over the diastolic pressure, as the heart relaxes between beats. A normal blood pressure is under 120/80. Talk to your doctor if it is higher than that. Simple lifestyle changes can help you lower your blood pressure and potentially avoid taking medication.

    2.BMI.This measures your weight for your body surface area. It is used as a reliable indicator of body fatness for most people. Use an online calculator to assess your risk. Search for “BMI” atwww.nhlbi.nih.gov.

    3.Waist circumference.Fat that is carried around the abdomen increases the risk of heart disease and type 2 diabetes. Measure your waist at the belly button, not where your clothing waistband sits. Women should be less than 35 inches and men should be less than 40 inches at the waist.

    4.Cholesterol.While the body makes all of the cholesterol it needs, it is also found in animal sources of food. High cholesterol can lead to heart disease and build-up of plaque in the arteries. Know your total cholesterol number and your low-density lipoprotein, or LDL, number. That’s the bad cholesterol that can cause problems. A healthy cholesterol number is below 200. A healthy LDL number is below 130, 100, or 70 depending on your heart disease risk.

    5.Blood sugar.This reading tells doctors how much glucose is in the blood. High levels of blood glucose cause diabetes, which increases the risk for cardiovascular disease. A healthy fasting blood sugar number is under 100 after not eating for 8 hours.

    © American Institute for Preventive Medicine

  • Banish Biting Bugs

    SELF-CARE CORNER

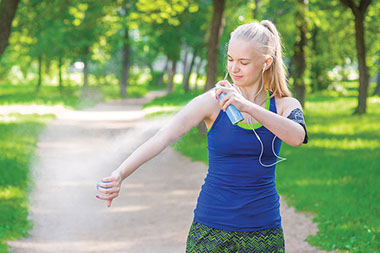
    Image of female spraying insect repellent on arm.

    Insects like mosquitoes and ticks may annoy you during a summer barbeque or camping trip. But an effective bug repellent does more than avoid an itchy inconvenience. It may help prevent you from getting sick. Mosquitoes and ticks may carry diseases that are dangerous to humans. Many ticks carry Lyme disease and mosquitoes may spread the West Nile and Zika viruses.

    To help keep mosquitoes away, use a repellent that’s been proven safe and effective by the CDC. Look at the label and choose a repellent with one of these active ingredients:

    *  DEET

    *  Picaridin

    *  IR3535

    *  Oil of lemon eucalyptus

    *  Para-menthane-diol

    The CDC recommends tick repellents that have one of the following active ingredients:

    *  DEET (20 to 30 percent): use on skin and clothing, but not under clothing.

    *  Permethrin: use on clothing and gear only.

    In addition to a repellent, there are other ways to avoid bugs:

    *  Avoid wooded and brushy areas when possible.

    *  Walk in the center of trails.

    *  Wear clothing that covers arms and legs.

    *  Minimize time outside at dawn and dusk, when mosquitoes are most active.

    *  Throw out standing water in tires, buckets, birdbaths or other outdoor items at least once a week.

    *  Do a full-body check for ticks after spending time outside.

    What to do if you spot a tick

    If you find a tick on your skin, it should be removed as soon as possible. Here’s what to do:

    *  Don’t panic.

    *  Use fine-tipped tweezers to grasp the tick as close to the skin’s surface as possible.

    *  Pull upward on the tick slowly and evenly. Don’t twist the tick or try to yank it out quickly.

    *  If parts of the mouth remain after you’ve tried to remove it, use the tweezers to try and get them out. If you can’t get them out, leave it alone so the skin can heal.

    *  After you’ve removed the tick, clean the bite area and your hands with soap and water, rubbing alcohol or an iodine scrub.

    *  If the tick is alive, don’t try to crush it. Instead, put it in alcohol or an airtight bag or container. You can also wrap it tightly in tape or flush it down the toilet.

    *  Ticks can also be removed by your doctor if you can’t get it out yourself.

    *  If you’ve been bitten by a tick, contact your doctor for follow-up care.

    © American Institute for Preventive Medicine
  • Do You Have Celiac Disease?

    SELF-CARE CORNER

    Image of wheat on top of white flour.

    If you can’t eat bread or anything containing wheat, rye, and barley because of gluten-a protein found in these grains-you may have celiac disease. Different people have different symptoms, but talk with your doctor if you or your child has one or more of these problems after eating bread or cookies, for example:

    *  Gas

    *  Bloating, belly pain

    *  Ongoing diarrhea

    *  Pale, foul-smelling or fatty stool

    *  Weight loss or weight gain

    *  Fatigue

    *  Bone or joint pain

    *  Bone loss or weakening

    *  Anemia (lower red blood cell count)

    *  Behavior changes (children become irritable)

    *  Tingling, numbness in the legs

    *  Muscle cramps

    *  Seizures

    *  Itchy skin rash

    © American Institute for Preventive Medicine

  • How To Put In Eyedrops

    SELF-CARE CORNER

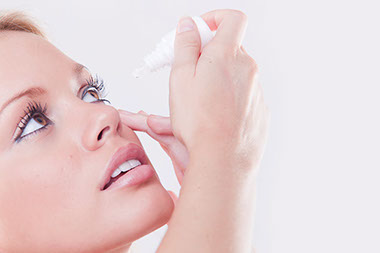
    Image of young women putting eyedrops into eye.

    *  Wash your hands with soap and water.

    *  Shake the eyedrop container gently. Make sure the prescription is for you. Check to see how many drops you are to put in and when.

    *  Remove the cap. Set it aside. Do not touch the dropper tip with your hand.

    *  Tilt your head back. With both eyes open, look at a point on the ceiling.

    *  Pull your lower lid down gently to form a pocket for the drop. Position the tip of the bottle less than an inch above your lower lid.

    *  Squeeze the bottle lightly to allow the drop to fall into the pocket.

    *  Close your eyes without squeezing them. Keep eyes closed for 30 seconds. Gently blot with a clean tissue.

    *  Replace the cap on the eyedrop bottle.

    *  Keep eyedrops out of sunlight.

    Other tips:

    *  Do not wear contact lenses while using eyedrops or ointments.

    *  If you have eyedrops and eye ointment, put in the eyedrops before the ointment.

    *  You may find this easier to do in front of a mirror or lying flat on your back.

    *  Check the bottle’s expiration date. Throw it away if outdated.

    Source: National Institutes of Health

    © American Institute for Preventive Medicine

  • Over-The-Counter Overdosing?

    SELF-CARE CORNER

    Image of liquid medicine.

    For a medicine to work for you-you’ve got to take the right dose. Many over-the-counter liquid medicines-such as pain relievers, cold medicines, cough syrups, and digestion aids-come with spoons, cups, oral droppers, or syringes designed to help you measure the right dose. To avoid giving too much or too little of a medicine, use these 10 tips from the FDA:

    *Always follow the directions on the Drug Facts label.Read the label every time before you give the medicine.

    *Know the “active ingredient” in the medicine.This is what makes the medicine work and it is always listed at the top of the Drug Facts label. Make sure, if you’re taking more than one medicine such as to treat a cold and a headache, that both don’t have the same active ingredient. You could be giving two times the normal dose. If you’re confused, check with your doctor or pharmacist.

    *Give the right medicine, in the right amount.Medicines with the same brand name can be sold in different strengths, such as infant, children, and adult formulas. The dose and directions also vary for children of different ages or weights. Always use the right strength and follow the directions exactly.

    *Use the dosage delivery device that comes with the medicine, such as a dropper or a dosing cup.A different device, or a kitchen spoon, could hold the wrong amount of medicine. And never drink liquid medicine from the bottle.

    *Know the difference between a tablespoon (tbsp) and a teaspoon (tsp).A tablespoon holds 3 times as much medicine as a teaspoon.

    *Know your child’s weight.Dosage amounts for some medicines are based on weight. Never guess how much to give your child or try to figure it out using instructions for the adult dose.

    *Talk to your doctor, pharmacist, or nurse to find out what mixes well and what doesn’t.Some medicines should not be taken with other medicines, vitamins, supplements, foods, and beverages.

    *Prevent a poison emergency by always using a child-resistant cap.Relock the cap after each use. Be especially careful with any medicines that contain iron. They are the leading cause of poisoning deaths in young children.

    *Store all medicines in a safe place.Some are tasty, colorful, and many can be chewed. Store all medicines and vitamins out of your child’s (and your pet’s) sight and reach.

    *Check the medicine 3 times before using.First, check the outside packaging for cuts, slices, or tears. Second, once you’re at home, check the label on the inside package to be sure you have the right medicine and that the lid and seal are not broken. Third, check the color, shape, size, and smell. If you notice anything unusual, talk to a pharmacist before using.

    © American Institute for Preventive Medicine

  • Stay In The Game

    SELF-CARE CORNER

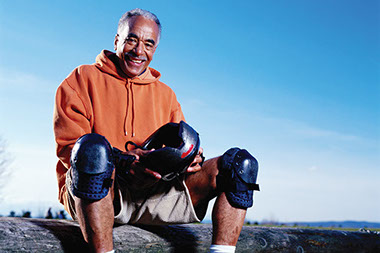
    Image of older man wearing knee pads while holding a helmet.

    Although many athletes understand the importance of keeping their muscles and bones healthy, it’s also important for them to take care of their skin. Sports equipment, especially protective helmets and pads, creates a warm, moist and dark environment for the germs that can cause skin infections to grow.

    “Athletes are at an increased risk of skin infection, which can have serious consequences and may take them-and their teammates-out of the game for days, weeks or months,” said dermatologist Jeffrey V. Benabio. “If athletes notice anything on their skin that itches, burns or may be infected, they should see a board-certified dermatologist or sports medicine doctor.”

    To help prevent skin infections, Dr. Benabio recommends that coaches, athletes, and athletic trainers follow these tips:

    *  Keep cuts and scrapes clean and covered with a bandage until healed. A cut or scrape weakens the skin’s defense and allows germs that cause infections to enter.

    *  Prevent blisters to reduce infections. Apply a pad, gel or spray to areas that routinely blister. To help prevent blisters on the feet, ankles and hands, consider using specialized gloves and socks or wearing two pairs of socks. Athletes should also make sure that their footwear fits properly.

    *  Wear moisture-wicking clothes. This helps keep the athlete’s skin dry and prevents germs from growing.

    *  Wear sandals in the locker room. Wearing sandals or other shoes helps reduce infections on the feet.

    *  Shower after every practice and game. In addition, athletes should use an antimicrobial soap and wash their entire body.

    *  Do not share personal care items. Athletes should always use a clean towel after showering and use their own towels, soaps, razors and other personal care items.

    *  Wash clothes and towels after each use. Sports bags should also be washed, as germs that cause infections can remain in the bags and grow.

    *  Disinfect equipment, including protective gear, daily. For proper disinfection, follow the manufacturers’ instructions.

    *  Perform regular skin checks. Athletes should check their skin daily, especially those in high-risk sports, such as wrestling. Look for any changes, such as cuts, sores, redness, swelling and pus, and report any changes to an athletic trainer or doctor.

    © American Institute for Preventive Medicine
  • Traveling With Diabetes

    SELF-CARE CORNER

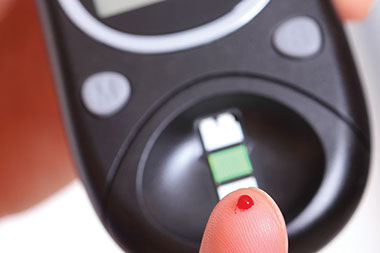
    Image of pricked finger about to test blood glucose levels.

    The American Association of Diabetes Educators suggests a plan for ensuring your next travel adventure is safe and successful.

    Over-pack your medications.

    Gone for a week? Pack two weeks’ worth of your diabetes medications in case of travel delays or misplaced supplies (insulin, syringes, testing strips, extra batteries for your pump, a first-aid kit, glucagon emergency kit). If you use an insulin pump, ask the company if you can bring a backup in case yours fails. Have a prescription from your doctor for insulin or oral medication in case of an emergency.

    Protect your supplies.

    Keep your medications and supplies close at hand and don’t put them in checked luggage or in the car trunk, where they can be exposed to harmful extreme temperatures (too hot or too cold). If you’re flying, keep them in the original packaging (so no one questions they’re yours) in a bag separate from your toiletries, as requested by the TSA. Don’t worry, the TSA allows you to go over the 3.4 liquid-ounce carry-on limit for diabetes medications and supplies.

    Identify yourself.

    Wear your medical bracelet or necklace that notes you have diabetes and take insulin (if you do). Bring a doctor’s note that explains you have diabetes and lists your medications, as well as a prescription in case you need more. Carry a health card that includes your emergency contact and doctor’s name and phone number. Learn how to say “I have diabetes,” “sugar,” and “orange juice, please” in the language of the country you are visiting.

    Carry snacks and low blood sugar treatment.

    Low blood sugar (hypoglycemia) can strike any time and food access during travel is unpredictable, so be sure to bring plenty of snacks such as peanut butter crackers, granola bars, and trail mix as well as glucose tablets or gel.

    Simplify flying.

    Tell the TSA folks that you have diabetes (they’re used to accommodating people with health issues). Visitwww.tsa.gov/traveler-information/passengers-diabetesbefore your trip to learn about current screening policies. If you plan to inject insulin while flying, be forewarned-the pressurized air can make it more challenging to draw up your insulin, if using a vial and syringe, so be extra careful not to inject air into the bottle.

    Test often.

    New foods, increased activity, and different time zones can throw your glucose levels out of whack, so be sure to test frequently, including before and after meals. If you take insulin, keeping your levels steady can be tricky when changing time zones, so make a plan to adjust your schedule for injecting. Before your trip, see a diabetes educator, who can help you with this challenging process.

    Favor your feet.

    Wear comfortable well-fitting shoes and socks at all times. Never go barefoot. Check your feet often, especially after a hike or long walk. Feet and ankles often swell during flights so consider wearing light knee-high compression stockings or bring thinner socks to change into if your feet swell. Wear a shoe that can be loosened if that occurs. Pointing and flexing your ankles during a flight can improve blood flow in your calf muscles and decrease swelling as well as lower the risk of blood clots.

    Prepare for a health emergency.

    If you need medical treatment, ask your hotel to recommend a local doctor who treats diabetes. Before you travel overseas, get a list of local English-speaking doctors through the International Association for Medical Assistance to Travelers atwww.iamat.org.

    © American Institute for Preventive Medicine

  • 5 Things To Know About Yoga

    BE FIT

    Image of women in yoga position.

    Yoga typically combines physical postures, breathing exercises, and meditation or relaxation. Researchers are studying how yoga may be used to help improve health and to learn more about its safe use. If you’re thinking about practicing yoga, here are 5 things you should know from the National Center for Complementary and Alternative Medicine:

    1. Studies suggest that yoga may be beneficial for a number of conditions. Recent studies in people with chronic low-back pain suggest that a carefully adapted set of yoga poses can help reduce pain and improve function. Other studies also suggest that practicing yoga (as well as other forms of regular exercise) might have other health benefits such as reducing heart rate and blood pressure, and may also help relieve anxiety and depression.

    2. Research suggests that yoga is not helpful for asthma, and studies looking at yoga and arthritis have had mixed results.

    3. Yoga is generally considered to be safe in healthy people when practiced appropriately. However, people with high blood pressure, glaucoma, or sciatica, and women who are pregnant should modify or avoid some yoga poses.

    4. Practice safely and mindfully. Everyone’s body is different, and yoga postures should be modified based on individual abilities. Inform your instructor about any medical issues you have, and ask about the physical demands of yoga.

    5. Talk to your doctor about any complementary health practices you use, including yoga. Give them a full picture of what you do to manage your health. This will help ensure coordinated and safe care.

    © American Institute for Preventive Medicine

  • Common Gym Fears & Solutions

    BE FIT

    Image of person at gym with a trainer.

    If going to the gym makes you nervous, you’re not alone. Many people feel uncomfortable going to a new place with new people. But, if you find ways to deal with these fears, you could end up with a healthy habit that makes you feel great!

    Fear #1: I don’t know how to use the equipment.

    Solution: Ask for help from others. This can be a gym employee, personal trainer or a trusted friend. When choosing a gym, choose one that is well-staffed and has helpful employees who make you feel comfortable. Another option is to join a gym your friend already belongs to, and set up a time to go with them. Some gyms have personal trainers who work with members and show them how to use the machines and other equipment.

    Fear #2: I don’t know what to do at the gym.

    Solution: Have a plan before you go. Many fitness websites have printable exercise plans, or you can make your own by writing down a few activities yourself. Start with simple things you already know how to do, such as walking or running. Another option is to take a class you’ll enjoy and follow with a few minutes of stretching.

    Fear #3: I don’t want people looking at me while I exercise.

    Solution: Many people feel self-conscious at first. But, most people are there to exercise – not look at others. And they may be just as nervous about others watching them as you are. Wear comfortable clothing. Don’t worry about the latest styles, but choose something that makes you feel good and allows you to move freely.

    If you’re not comfortable going to a gym, don’t let that stop you from exercising. Choose workout videos that can be done at home. Many libraries have a variety of videos so you can try before you buy. If those don’t appeal to you, lace up your shoes and walk around your neighborhood.

    © American Institute for Preventive Medicine